The evolution of modern goods, including everyday ones, has one key feature - the new generation of leather is becoming more massive, and the design is simplified as much as possible so that the stinks become sensible and accessible to the skin. New materials will be shared with your own most important supporter of power, tsim, attaching yourself to increased respect.
To the very same, depending on your nutrition, how to sheathe the stele and walls with plastic panels correctly, do not think that for whom special knowledge of that vminnya will be needed. The installation technology is even simpler and will be enlightened to an unseen maestro.
Whether it be necessary to improve the foundation, on which further work is carried out. We have divided mi rozpovimo about all factors, yakі it is necessary to pay attention to the installation of the frame reshetuvannya, scho allow you to get rid of a lot of problems after the beginning of the exploitation of the premises.
First of all, why did the wart begin - the dismantling of the old refining, which is like that. At our point of view, everything is visible, everything that can make the frame rails fasten to the wall, or damage it like a plastic panel.
For example: PVC stele plate weakens the point of attachment, as a result of which the dowel-screws of the small dozhini are broken; old plaster or kahel, which is filthy trimmed (div.), can damage plastic when falling.


Waterproofing and chemical processing
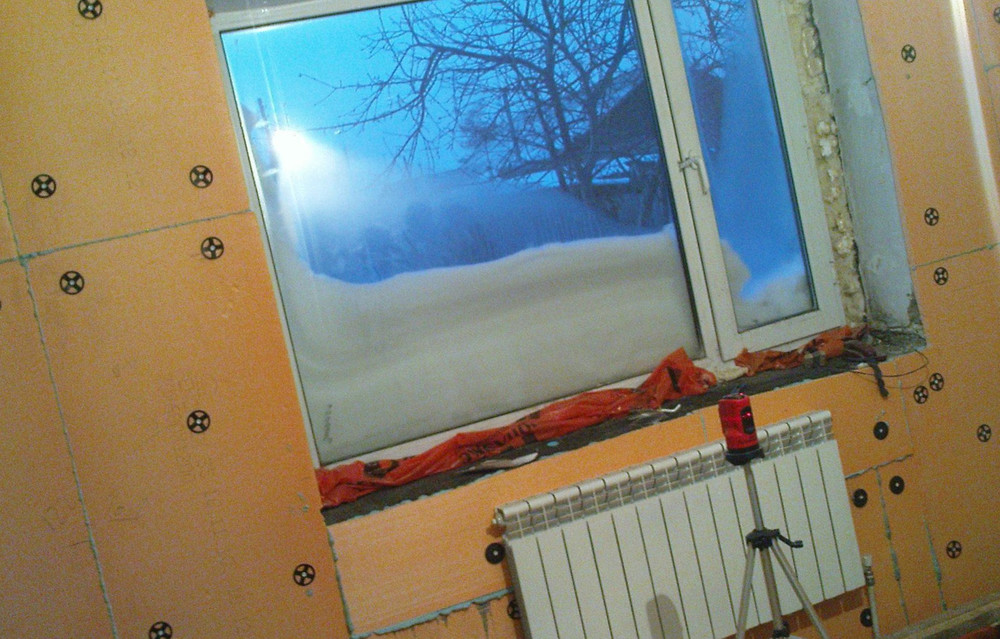
Due to the resistance to water, PVC panels are most often used for bathrooms. Even though the material of the exterior cladding is not afraid of water, it does not mean that it is possible to resist such an important stage in the preparation of an accommodation, like waterproofing.
It is necessary to prevent water from getting on the walls, slats to the frame and insulation. As a result, you will forget about the shower, use warm water and protect the stonework (near the bathrooms).
On the balcony, like a water insulator, vicarious polythene foam. This variant is cheap, convenient and reliable. For concrete and concrete walls, it is better to use waterproofing seepage, as it is easy to apply with a penzle, which will allow you to build a warehouse for the most important place.

Warming
If you planned to sheathe a room with thin walls that overlook the street, otherwise the scorching can’t cope with the vanity (balcony, attic is too thin), then don’t forget about insulation (div.). I use impersonal materials that are recognized for living life, and we will look at some of them below.


Father:
- One of the most effective methods of insulation is to cover all the rooms with a rare polyurethane foam.. Obviously, without the necessary possession, you cannot work such a robot with your own hands, but through yoga popularity and high energy efficiency, guess about the pinny insulator we just goiter,
- The offensive type of insulators - the back of the material from the ball from the metal foil, for example "Pinofol". There are two functions to beat - the heat of the steam insulator. Zavdyaki to the fact that stinks are released from the rolls, they are even easier to install. Suffice it to expand the material according to the wall and close it for additional rails or special anchors.
- Mineral wool they are impersonal species, as if they vibrate from natural and synthetic syrovin. This material may be low for use in living quarters, so read the instructions carefully. Through those that a fine pile can penetrate into the legend, vicorist the mineral wool at the bottom with a visceral penofol, otherwise cover it with cellophane plivka.
- Low price, ease of installation and low heat conductivity to make polystyrene one of the leaders in the market.. A five-centimeter panel of such material makes the heat not warmer, the lower wall of the curtain is 20 cm.
Easy installation pіnoplex
Dodatkovo let's say a couple of words about pinoplex, which can be placed under the frame (div.). This material can be of high quality and equipped with grooves for stitching, for which reason wine can serve not only as a heat-insulator, but also as a base for plastering.
Construction installation
After all the preparatory work, we decided to install the frame, on which our panels will be fixed. Tsya part of the work is nayvidpovidalnisha, shards won’t signify a little further away the mitsnist and equanimity of the false walls that are going to be built. Tsya construction can be made in dekilkom ways.
Lathing

We start from the fact that we reconcile for the help of the everyday equal, the equalness of the wall, which is sheathed. If your tool is small, then vicorate the PVC panel itself as the basis, as a rule, or equal to a wooden lath.
We apply our rіven to the wall and marvel at the resurrection. Even if the difference is insignificant, then our task is even easier, to finish just upholstering the wall with grouting elements (wooden lath or PVC straight), it’s less necessary to see the need. Although the difference varies from 4 cm and more, it will be necessary to build a full frame, about which we will tell.


The sheathing is made up of several belts, a number of which can be deposited depending on the height of the place where they are being processed. The middle between them becomes 40-50 cm.
The first belt is installed on the very part of the wall that is vibrating. For this, we apply the rail of the necessary time to the marked month and drill it at once with the wall. In the opening, we hammer the plastic part of the dowel-screw with a hammer and install the expansion element, and the dowel.
Please! Do not turn the screw to the end. For timchasovy fixation, it is enough to screw it in half, so that it can be broken by the hands. So, you will be able to unravel the fastening points, as if you can blame it with a little bit of drilling.
The installation of PVC rails is not disturbed by anything, we won’t be able to look at them, but we’ll turn to them only once, if the time comes to sheathe the walls with plastic clapboard.


Dali krіpimo another belt, which is the best roztashuvati at the point with the greatest relief from zero (the month of strengthening the first belt). We repeat the entire installation procedure described above and install the rails behind the line. To compensate for the unevenness of the wall, vicorist pins, which can be cut from slats.
How to replace the vіdmіnno fit the remote pads, like vikoristovuyut during the installation of vicons. As soon as you see that you are compensated, you change the comrades of the slats, then we strengthen not the belt itself to the wall, but the lining, until we are attached to the aid of the great self-tightening.
Virіvnyuvannya іnshih belts are not in the warehouse of difficulties, shards as a guide have already laid the foundation. Just apply a long-standing equal object, and carefully trim the previously removed area. The butt of which I will accept the ideas in the photo is more.

Now, let's take a look at the main rules for ruffling belts:
- As on the wall, which is sheathed, there is a present or door opening, then two belts are mounted along the upper and lower edges, shaping by themselves, the horizontal basis of the possible cut.
- The vertical part of the mowing may be placed strictly behind the equal, it is necessary to follow the dove of all the belts, which will be attached to it. To see it right away, take a look at the diagram.
- Stitch the belts on all the walls, orienting behind the equal. Through the war, the stench can become a single looped line, tightly adhering, to each other with kuts, to ensure the necessary stiffness during deformation.
In addition, it is significant that all the time the roztashuvannya pіdvіkon, sockets and vimikaіv povinnі vіdovnjuvatysya 10 - 20 centimeter inserts slats, scho facilitate further installation and increase the thickness of the skin.
frame

The links of the frame vimagatime for you greater vitrates and zusil, lower installation of the sig- nificant reshetuvannya, but the priority, which is taken into account, is really such a pidkhid. Zocrema, you have the ability to bend the wall, be it curvature.
The material for such a frame can be a wooden beam (minimum cross section 35x35), or metal profiles, designated for drywall. Schemes for their installation do not have any fundamental principles, so we can look at the process with the use of other material.

In order to protect the small expanse of the balcony and the bathroom, it is recommended to vikoristovuvat stele profiles. There are two kinds of stench: a direct profile with a size of 27 by 28 mm and the main one - 27 by 60 mm. The value of such a design will be sufficient.
Please! When buying a profile, twist the eye of the hand and evaluate its hardness. If the wine bends like foil, then put it down. The cost of capital to the frame is not worth the cost of the protected pennies.
We start with the fact that we are working to mark the future area, for which we need: temple, water or laser riven, thread, which is far blue, olive and tape measure.
- Dali, along the otrimanih lines, stuffed a direct profile, passing through at that door opening (opening starts from the month of the future mowing).
- After that, vicorist profile 27x60, we install the main verticals of the window and door openings. The parts of the construction are to blame and stand strictly behind the equal. Now it’s necessary to remove those knots, for which we stretch the kapron thread and for additional support, we work hard to fix it.
- Belts come to vertical profiles. At the localities, vicariate the same z'ednuvach, and the crab.
Please! Don't forget to plug in the electric wires that come out of the sockets and lights. And if not, then you may need to dismantle the already sewn wall.
Panel installation

The axis of our crate is ready and the time has come to sew up the wall with plastic. The latest stage is left behind. Now that you have done everything correctly, it is not your fault to blame the daily difficulties.
Installation of panels is simple and intuitively understandable; We will try to show all the main subtleties, as well as inappropriate moments, which can be blamed if you decide to sheathe the walls with plastic.

Father:
- PVC moldings are the main goal of the successful majstrіv-pochatkіvtsіv, as it is supposed that the engineers, creating these schemes, forgot about the laws of physics and geometry. The main folding is the order of the arrangement of these elements, as well as the further installation of panels in them, especially the finishing ones. If your view on the right is like this, then don’t rack your brains - reduce the number of moldings to a minimum, replacing them with great skirting boards and stele baguettes.
- Give respect to number 5 - the best cut. Vin maє analogue without internal ribs, which is to sit on the glue, which will make it easier to work. From a wider range, all you need is all moldings numbered 7, 4 and optionally 1.
- If you still made the vicarista of the skirting boards, then glue the remaining finishing piece more beautifully, looking forward from the new trailing edge.
- When installing the remaining PVC sheet (the stick is in place, the cladding has begun), replace the inner kut with the starting profile 7, which is necessary to put on the plastic. If so, wedged the finish panel at the installation site, which allows for easy dismantling if necessary.
- Fixings for panels can be fixed in the fallage according to the material of the frame. For PVC rails, special clips are used, which are clasped into the central channel. For metal, it is best to use self-tapping screws with a press on wood - the stink of a thin flat droplet, which is a strong fixation of plastic. If your carcass is wooden, then vikoristovyte be it any way that is convenient for you: flowers, glue, screws or a stapler.

- Be careful if you fasten the plastic behind the help of a screwdriver. Particularly worthy are the frames from the metal profile. One unbearable move and the cue ball pierces the panel through and through.
- Starting to sheathe the skin wall, do not forget to install the first panel strictly behind the line. Stepping leaves need to be squeezed tightly, unique cracks at the seams.
- Now, a small instruction for cutting plastic. Forget about jigsaws, hacksaws and other saws. The stench can become a good thing when you open the electrical sockets, boxes and vimikachi when you open them. The tools of the tool cover the notches in the areas of the eye, which is important when installing the panel in the profile.
- Vykoristovyte zvichayniy montage nizh, vіn clerical. For whom, put the panel on a stool so that the space of the troch transferred to the eye protrudes beyond the edges. Apply a braid and crepe a line with a great olive from the back side of the plastic. To make an incision, after which to break the protruding edge. Now it is no longer enough to spend a forest at the mist's wigin from the reverse (facial) side.
The information given in this article should be read in order to correctly approach the feeding of the plastic panels. We tried to look at all the most important aspects. But if you have lost your mindless moments, you can easily find all the data in our video collection. Good luck with the repair